

Sadly, though my tomato plants got really big and seemed to be developing well (flowers then fruits) it turned out that they had some sort of fungal wilt and I've now had to discard the plants and the soil. First the leaves started to go yellow, but I thought this was just the heat or lack of water. But it got worse, and leaves dried up completely, and the green tomatoes started to turn brown and blotchy. I believe it was fusarium wilt after googling the symptoms.
I haven't taken any pictures (sorry) but it isn't very nice to see except if you wanted to identify your own wilt. All I know is that I had to throw out all the soil and disinfect tools and gloves I know I'd used with them, in case I spread it to other plants. The courgette right beside the tomatoes is fine -- maybe courgettes can't get this variety of wilt. A potted physalis is showing signs of it unfortunately, in fact I think this plant might have been the first to get it. I'm not sure what caused it, though I hear poor drainage can make wilts more likely -- this year my plants were in a tall PVC type growbag (see photo in my previous blog entry) and had water retaining crystals in the compost, maybe the drainage wasn't as good as last year when I had pots on top of a regular flat plastic growbag.
I had one "spare" tomato plant at the bottom of the garden that is starting to fruit, so perhaps I will still get a few tomatoes, though this has been a disappointing year for them in my garden.
Subscribe To
Sunday, 12 August 2012
Tuesday, 17 July 2012
First courgette harvested!
 |
 |
This is the first courgette that's ripened on my Taxi plant. (A yellow variety as you can see). It was about 10 cm long. So they haven't all just dropped off when tiny, as they did last year. I also fried one of the flowers - not stuffed or anything, just in oil. They tasted good! Hopefully next time I pick one there might be two or three.
Monday, 9 July 2012
July garden flourishing
The garden is doing well from all the rain (with a bit of sun mixed in).
My tomatoes and courgette plants are very leafy and big, with baby tomatoes starting to develop, and baby courgettes.


This dahlia flower has just opened fully. The plant has also got very big, with a few other buds. It's growing just by my lupins and in full sun, so I think it likes the location.
 |  |
I'll have to wait and see whether the courgettes will drop off (not fertilised) as mine did last year. I think they are bigger than last time though and I have more flowers of both sexes at the same time, so I'm hopeful.

I tried to pollinate it with a cotton bud to give it the best chance in case the bees haven't helped me.

This dahlia flower has just opened fully. The plant has also got very big, with a few other buds. It's growing just by my lupins and in full sun, so I think it likes the location.
Thursday, 31 May 2012
Tomatoes planted out
I hardened off 2 Sweet Million baby tomato plants (red) and 1 Sungold (yellow) over the last week or 2 and finally planted them out. The reds are from seed and the yellow was bought young. I wasn't growing Sungold this year but I couldn't resist buying it for 50p since Sungold were so good (tasty and prolific) last year. All are planted in one polyethylene-type planter. My growbag with pots on top worked well last year, hopefully this will be as good.


Thursday, 24 May 2012
moved house
Haven't managed to post for a while. Mostly because I've been moving house. I moved most of the garden with me (or tried to) since we weren't going far.
Is interesting what's made it. The tulip bulbs have probably about 70% survived (depending on flowering stages, maybe I didn't dig them up that carefully) and allium have done well and are about to flower now. Some of these bulbs I planted in pots sunk into the flowerbed (knowing that I would be moving them), and these have done the best as I was able to transfer a big root system more easily. These bulbs were all from last spring/summer anyway so for them to repeat flower and survive a move is good.
This transplanted lupin seems happy too!


My Russells lupins are a few years old and re-seeded themselves into multiple plants. I moved 3 of them - this one moved first into the sunniest spot and seems to be doing better than those in more shade. Actually it has 3 flower spikes now which is more than it ever at once had in the old garden! I think the dry weather has also minimised the growth of the others. I thought I'd try a few spots though as I like how they nourish the plants around them. The one above has lots of seedlings (love in a mist, cornflower, poppy) and a moved previous year's dahlia tuber doing well near it. I am prepared to put up with it popping up all over the garden for the benefits. :) I saw some blue bi-colour lupins recently and was sad not to buy them, but I knew I had enough of the current ones. Maybe next year.
Friday, 30 March 2012
chick pea & pomegranate plants from seed


This is what a 3 week old chick pea plant looks like, pretty! And below are sprouted pomegranate seeds, also after about 3 weeks on moist kitchen roll in a plastic food bag, in the dark. The seeds just put straight into compost haven't appeared.. but I've potted these germinated ones.

Friday, 16 March 2012
thrifty seed ideas
 I had seen people elsewhere on the web saying that you could use toilet roll cardboard inners to make cheap biodegradable pots, also that they are good for transferring young plants to outside without having to disturb their roots. I am trying some salad leaves as it is too early to grow these outside yet. Rocket and mustard Oriental Pizzo. Rocket grows very fast - this is only a few days after sowing.
 I read in Alys Fowler's inspiring book "the Thrifty Gardener" that many grocery items or seeds from fruits/veg you buy can be planted. She suggested chick peas and pomegranates amongst others, to make nice house plants (chances of an actual crop will be low but they should look nice), so I am trying both. The chick pea is beginning to grow as you can see. I just sprouted some dried chick peas from a packet for a few days (soaking then rinsing) and planted a few in a pot of compost.
 Finally, some seeds planted in egg shells (eggs halved and cleaned then put back in the egg box). I have planted a few different flower seeds. Again, I think you can plant on in the shells (will need to crack open the bottom to let the roots get out, the egg shell should slowly break down and put calcium to the soil.)
Saturday, 10 March 2012
more seeds

More seeds germinating on a filter paper, left to right: 2 aquilegia vulgaris (columbine), a long johnny jump up viola, mesembranthemum.
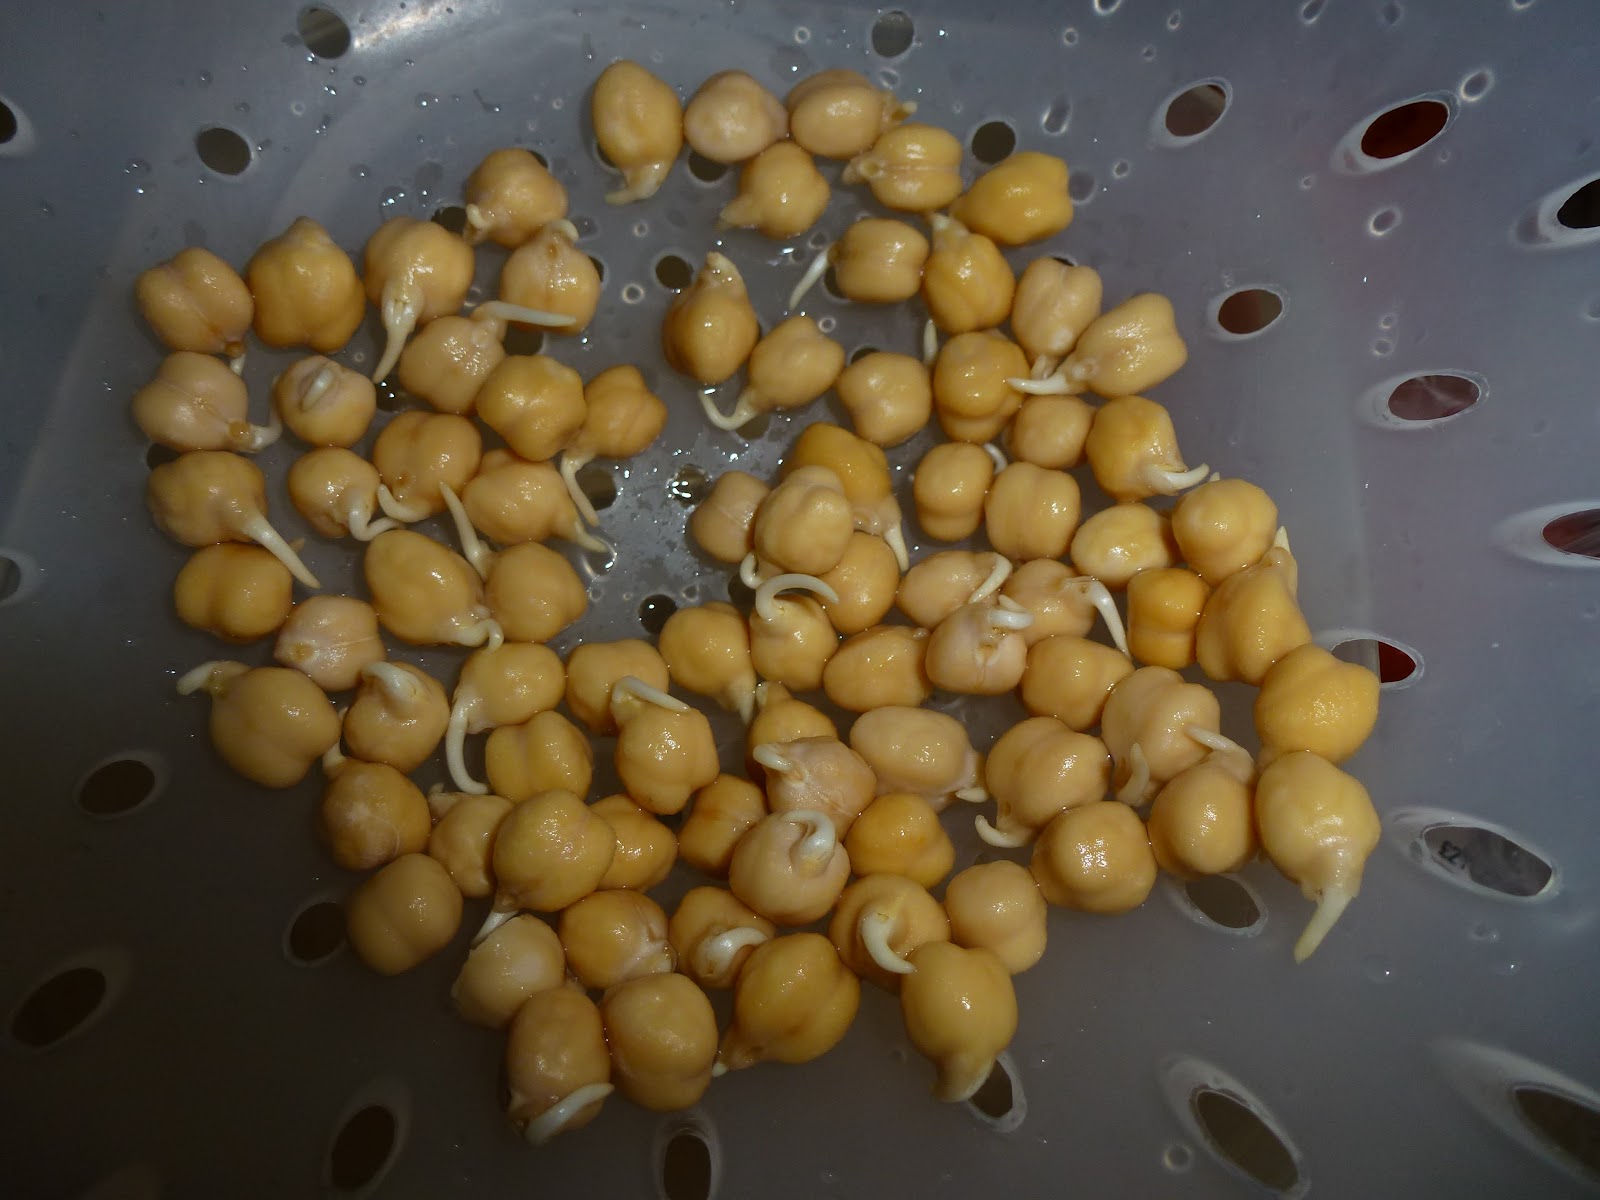
sprouting chickpeas
Sprouted some chickpeas (just dried ones from a packet) to eat and also to try growing some as I read they can make a nice house plant. To sprout them I soaked them overnight more than covered in water. Then drain and rinse, then keep rinsing a few times a day if you can remember, for 2-3 days. Leave somewhere dark, I did this in a colander and tried to make sure they were quite dry in between rinses so that they wouldn't go mouldy. On the packet it does say don't eat raw: I think you can when soaked and sprouted this way but with caution/in small quantities as it doesn't agree with everyone.
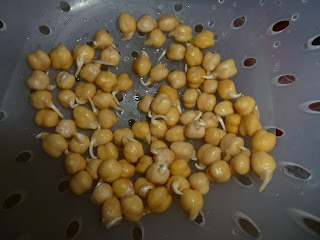
 For planting chickpeas it is still worth soaking, as I kept a few moist separately that weren't for eating which weren't soaked and they didn't do as much sprouting or swelling up.
 For planting chickpeas it is still worth soaking, as I kept a few moist separately that weren't for eating which weren't soaked and they didn't do as much sprouting or swelling up.
Thursday, 8 March 2012
moving house (& garden)
I mentioned before that I should be moving house soon. So knowing that I had tried to save money by digging up and saving last year's spring and summer bulbs, and replanting them for this year. That seems to be working out for me, I'm not sure what the success rate is as I didn't count them, but I have at least 15 tulip and other bulbs with healthy green shoots now!
 Also, I really wanted to buy a passion flower climber and a ceanothus for the new garden (California lilac, it should have gorgeous blue flowers once mature), and yesterday I gave in even though we haven't got a moving date yet. They were pretty cheap as small plants, a bigger ceanthus online cost several times the price so it's a risk worth taking. (Not sure if this is the variety I think is the prettiest but if it dies I may invest in a nicer one later). I am going to try keeping them in pots until I can plant them in the new garden. The ceanothus looks pretty happy. I have "mulched" it with some dead grass, and plan on using a frost fleece if it gets very cold (I know it is probably quite frost hardy as it's evergreen, just want to take extra care of it until it gets bigger). The picture is of it next to my strawberry plants which have survived the winter. 4 pots rather than original 2 - since they had sent out runners which I planted.
 The passion flower was the only one in the shop and looked a bit spindly. When I got it home all the leaves had fallen off! I've left one in the pot to remind me and the plant what the leaves looked like! It still just had some tendrils as a little bit of green. I put it in a bigger pot and it is sitting in my sunny window while I try to coax it back to life. It won't have a fence or trellis for proper support until we move.

 The passion flower was the only one in the shop and looked a bit spindly. When I got it home all the leaves had fallen off! I've left one in the pot to remind me and the plant what the leaves looked like! It still just had some tendrils as a little bit of green. I put it in a bigger pot and it is sitting in my sunny window while I try to coax it back to life. It won't have a fence or trellis for proper support until we move.
viola and aquilegia seeds germinating


Also, 1 of 4 aquilegia seeds had finally germinated after 10 days! (see below. Another looked about to burst its seed shell). This way might still be quicker than the ones in compost, or at least I can't see those yet. They have been in there about a week longer.

Have now added some mesembryanthemum (livingstone daisy) seeds to the bag, this time only on kitchen roll rather than filter paper. I got some of them to grow last year in compost, but once out in the garden the young plants struggled and flopped over. I will try to keep them indoors until they're bigger this year. I wanted to try planting in cat litter (diachotomaceous earth type) because I've read that you can, but it seems a bit excessive for me to buy a big bag just for them! Even though cheaper than buying cactus media. I ended up buying a full size plant last year after the seedlings died, which now looks like the frost have killed it but I have cut back the dead bits and will wait and see.
Monday, 5 March 2012
spring in the garden

Outside, 1 crocus has flowered (they never normally seem to flower from bulbs, for me) and some pretty primula. The primroses seem less happy though.

 Some spring green: leaves/shoots from a Russell lupin coming back for the 3rd year (right), and an aster (bottom left). Lupins seem to do well at growing without much help, and can fix nitrogen in the air making the soil more fertile for other plants. The only downside so far has been that mine have been pink and I'd prefer other colours, were meant to be mixed. Maybe this years will be other colours too! I have saved some of the seeds, so when we move house I might try planting those as well as see if I can move the ones growing now. The pic below is from last May of my lupin flowering.
Day 5 - baggy germination
 |
| viola seeds germinating after 5 days in the baggy |
Thursday, 1 March 2012
fresh food for our hamster
 |
| carrot |
 |
| pea pod |
 |
| baby sweetcorn |
 |
| carrot |
 |
| broccoli |
This is our hamster enjoying eating various fresh veg (all raw). Is good to give them fresh fruit or vegetables some of the time as a treat, in addition to their normal dry food - check what's OK to give first though. Others he enjoys are lettuce, cucumber, sometimes berries (strawberries, blueberries - but seems to like these less). You shouldn't feed citrus, onion or tomatoes.
Monday, 27 February 2012
germinating seeds in a Baggy

The baggy involves spacing out some seeds on a moistened piece of (coffee) filter paper which is folded up and put in a plastic zip lock food bag, left in the dark (or light depending on the seeds) and re-moistened with a sprayer. In theory 7-10 days later some or all of the seeds will have germinated and can be planted in compost. This saves space and lets you keep types of seeds separate, also you can see for yourself the germination success rate and conditions preferred.
If it works well I will try some more this way too! Less messy, and will only use compost and valuable windowsill space once the seeds have already successfully germinated.
I think it's really too early to start many seeds but I'm itching to get started, this is still only a few of the seeds I plan to grow. Meant to be 6-8 weeks before last frost date, but I have got away with earlier. May just mean taking extra care of them to not let plants get too leggy or watered too much, so for this year's tomatoes I'll wait a bit longer.
I'm thinking of growing a taxi courgette again as I have a few seeds left, last year's had plenty of flowers of both sexes but apparently wasn't fertilised! The fruits dropped off before they grew much. I think maybe the pot I used was too small so may get a bigger one this time. (Smallish garden so preferred a container). Or just unlucky with weather/bees.
Sunday, 12 February 2012
Growing indoors

 At the moment it's snowy outside, so 2 primroses I bought are having to shelter on my windowsill until it melts. And this is my Tropicana sponsored seed germination pot (sweet peas).
Thursday, 26 January 2012
January shoots
Will post pics soon - some of the last year's spring and summer bulbs have started growing shoots in the garden. I dug up the bulbs and saved them in paper bags (to dry them out and stop mould growing, in a cold cupboard indoors). I'm not completely sure now which are which so they will be a surprise!
There might be tulips, narcissus, muscari and allium I think. I will blog which ones grow when they do as it will be interesting to see which you can keep year to year - no new spend! (I have bought some other plants I can't plant yet as I may be moving house.) I think some would probably regrow if left in the soil but I had planted other things so I wanted to dig them up.
There might be tulips, narcissus, muscari and allium I think. I will blog which ones grow when they do as it will be interesting to see which you can keep year to year - no new spend! (I have bought some other plants I can't plant yet as I may be moving house.) I think some would probably regrow if left in the soil but I had planted other things so I wanted to dig them up.
A couple of the larger bulbs I put in plant pots first before sinking into the soil as I plan to dig the pots up for easier transport if the moving house goes through. Others are in containers anyway, and the rest I will see whether they seem worth trying to move. The new plants I'll wait as long as I can before planting so it might be in the new garden - hence the cheap reusing of bulbs.
I have also seen pansies, anenomes, lupins and asters reappear to some extent. Last summer I had lots of poppies and cornflowers, I have more seeds if I need to replant.
Tuesday, 17 January 2012
Globe artichokes - how to cook, prepare and eat
 Ever wondered how?
You may not have tried a globe artichoke before, or you may have seen them but not known how to go about preparing and eating them. Maybe you have tried it on a pizza or from a tin. Once you know how it is not too difficult to cook from fresh, and they're very tasty! You can buy them in supermarkets or markets in the vegetables section when they are in season.
In the UK you are most likely to find them at Waitrose, other supermarkets if you're lucky.
 Globe artichokes are different from Jerusalem artichokes - these look a bit like ginger or potatoes (knobbly, whitish, with brown skin that you peel or chop off, then they can be boiled. They have a similar taste to globe artichokes though but maybe a little sweeter - also worth trying!).
Globe artichokes are round and green, with layers of leaves/petals. The bigger ones are probably tastier and have more flesh, but depending on the season or supplier they may be smaller and longer (as the one in my later pictures is), this is still OK.
How to prepare and eat globe artichokes:
1. chop off the stalk with a knife and discard, and wash the rest of the artichoke in cold water
2. cook by either microwaving for about 5-8 minutes on high in a microwave safe bowl or dish, with a little water and clingfilm to cover (optionally: you can add some lemon juice and seasoning to the water) OR by boiling in a large covered pan of water (again, can be seasoned) - this takes longer (25-45 minutes). They can also be cooked in a pressure cooker. When done, you should be able to pull a leaf off easily. The cooking time depends on size.
3. You can start to eat it straight away - just be careful as it will be hot! You'll need a large plate or something to collect the leaves and rubbish in, plus some butter and a sharp knife.

4. First, Pull off the first few smaller leaves from around the outside and discard. Then start pulling leaves off one by one, dip the end (that was attached to the artichoke) in butter, bring to your mouth and eat the flesh by scraping it your teeth!
 5. After eating the flesh, discard each leaf into your rubbish pile.
 6. Once you have eaten all the larger leaves, you'll get to some smaller thinner ones that don't have any flesh to eat.
 Pull all of these off and discard. Now you've reached the "heart" - but it is covered by the "choke" - thin inedible hairs that'll stick in your throat.
 7. Remove the choke by slicing it off from the heart. Try to cut so that you don't waste too much heart underneath but not too close as you won't be able to remove the choke in one piece and will end up eating bits of it - not pleasant!
8. Discard the choke. Chop off the bottom stalk/green bits from the heart if there are any left. Then eat the heart by cutting off portions and dipping in the butter.
Subscribe to:
Comments (Atom)